DW Spectrum User Manual
DW Spectrum servers supports simple remote access services that do not require port forwarding, or the Desktop Client will provide port forwarding when the Remote Access Tool is enabled.
Remote Access Key Concepts:
•User accounts configured for Digest Authentication are not allowed to make remote access connections.
•Only Site administrators can change the remote access settings.
•All remote access connections are logged in the Audit Trail of User Actions.
•A remote access service must be installed on the same machine as the server to be shared.
•The Remote Access Tool enables port forwarding for the Desktop Client and may not be required for all remote access solutions.
Supported Remote Access Services:
The following remote access services have been tested and many others will likely work without issue:
•SSH Protocol (openSSH).
•VNC – RealVNC, TightVNC, or UltraVNC.
•RDP – Windows Remote Desktop (Requires Public IP).
Remote Access Requisites:
•The connecting user must be a member of the Site Administrators permissions group, or a member of the Power User group when remote access is granted to power users.
•The Remote Access Tool must be enabled (default) for the Desktop Client to provide port forwarding.
•The server that will receive the remote connection request must be active and online.
•A remote access configuration files must be present in the server's available resources.
•The remote access client must have a network path to the Media Server.
Router, Gateway, and other network settings are not covered in the DW Spectrum user manual.
Create a Remote Access Configuration File:
Follow these steps to create a remote access configuration file on the server to be accessed or shared.
1.Create a file called port_forwarding.json in the following location per the operating system in use:
a.Windows: C:\Windows\System32\config\systemprofile\AppData\Local\Digital Watchdog\Digital Watchdog Media Server
b.Linux: computer/opt/Digital Watchdog/mediaserver/var
2.The port_forwarding.json file must contain the following structure
[
{
"name": "RDP",
"port": 3389,
"login": "admin",
"password": "123"
},
{
"name": "SSH",
"port": 22,
"login": "root",
"password": "456"
}
]
3.The port_forwarding.json file uses the following parameters:
Parameter Name |
Required or Optional |
Description |
|---|---|---|
name |
Optional |
Name will be displayed in the Desktop Client within the Server Settings -> General tab. |
port |
Optional |
The port of the remote access service – some remote access services do not require this parameter and it is only used for port forwarding by the Desktop Client. |
login |
Optional |
Login for the remote access user (add to the port_forwarding.json file for convenience) – can also be entered at the time of remote access connection. |
password |
Optional |
Password for the remote access user (add to the port_forwarding.json file for convenience) – can also be entered at the time of remote access connection. |
NOTES:
1.The login and password are for the machine providing the remote connection and not the login and password of server being shared. Credentials must be entered to complete the connection, these can be entered when establishing a remote connection or optionally placed in the configuration file so end-users can copy the login and password from the Server Settings -> General dialog.
2.The availability of the remote access feature and the path for the port_forwarding.json file will vary depending on the Edge server and is specific to each vendor. Refer to vendor documentation or support services for additional guidance.
Establishing a Remote Access Connection:
1.Open the Main Menu -> Site Administration -> Security dialog.
2.Ensure the Remote Access Tool switch is set to enabled.
3.Close the Site Administration -> Security dialog.
4.Select a server in the resource panel using the context menu (right click).
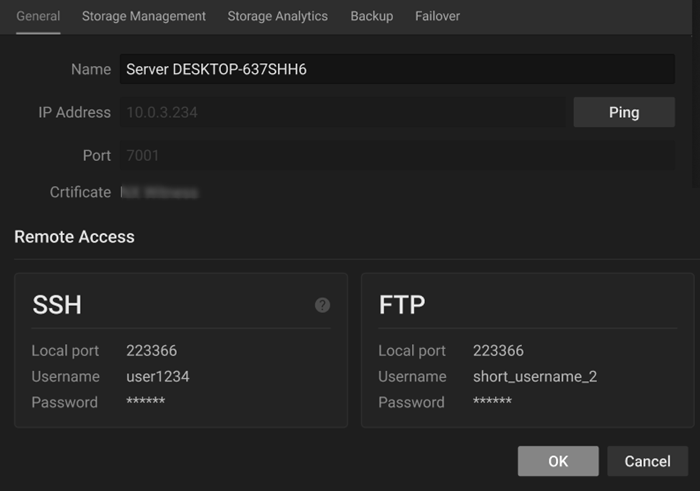
5.Open the server settings dialog from the menu and select the general tab.
6.The Desktop Client will display tiles with the remote connection parameters.
7.Use the port, login (username) and password to establish remote connection using chosen remote access service.
8.Close the Remote Connection when all remote tasks are complete.