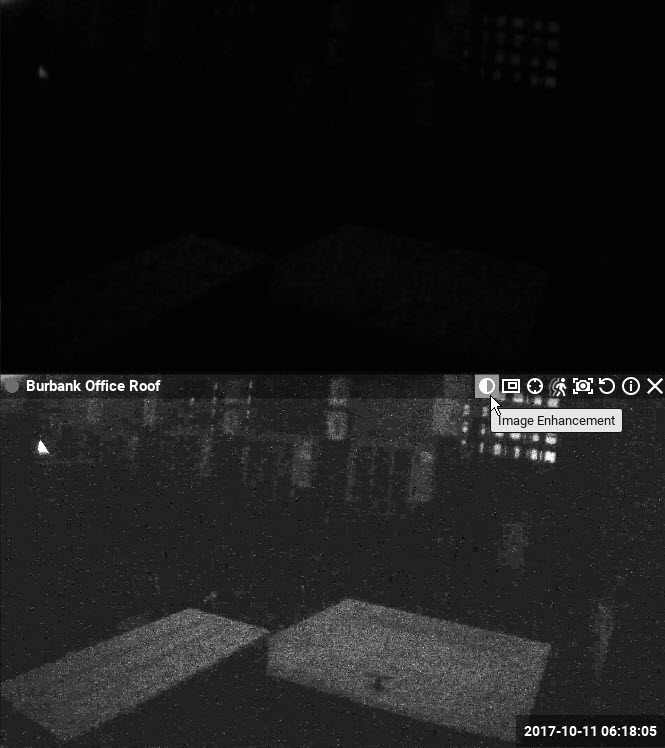
Image enhancement applies a set of adjustments to improve overall image quality.
Each camera and local video item has a button that toggles image enhancements on (![]() ) and off (
) and off (![]() ). You can use the default adjustment parameters that DW Spectrum calculates (using a standard gamma correction algorithm), or you can set the parameters manually. In most cases, the default settings are adequate.
). You can use the default adjustment parameters that DW Spectrum calculates (using a standard gamma correction algorithm), or you can set the parameters manually. In most cases, the default settings are adequate.

![]()
To set image enhancement parameters manually
1.Right-click on the desired image and select Image Enhancement (Alt+J) in the context menu.

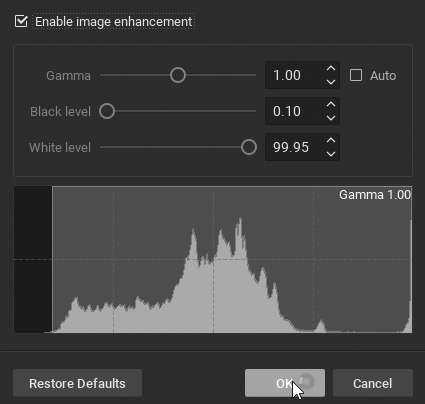
2.In the Image Enhancement dialog that opens, click the Enable image enhancement checkbox to turn image enhancement on. This will allow you to see the effect of your changes as they are made. Note that this setting is persistent – if it is active in the Image Enhancement dialog, it will be active for the selected item in layout.
3.Set the following parameters:
•Gamma - use the slider to adjust this value, where the lower the value the lighter the image will be. Check Auto to allow the gamma value to change to an optimal level as the other settings change.
•Black level and White level – use the sliders to adjust these values, noting the impact on the histogram section. It is best to cover as much of the histogram area possible. If too much of the histogram is clipped on the left or right sides, important graphic information will be lost.
3.You can click Restore Defaults at any point to restore the default enhancement settings.
4.Click OK to save your changes or Cancel to discard them.
![]() Note: The current state of image enhancement is always applied to screenshots, and optionally to exported video (it can be turned off in the export settings).
Note: The current state of image enhancement is always applied to screenshots, and optionally to exported video (it can be turned off in the export settings).