DW Spectrum User Manual
Use the Desktop Client running on what will be the display computer to complete the following steps.
Create a new Video Wall
1.Open the Main Menu and choose New > Video Wall.
2.Enter a name for the Video Wall.
3.Apply changes.
4.The newly created and named Video Wall will be added to the Resource Tree.
Configure Video Wall Layout
To make a computer display part of Video Wall it is necessary to perform the following settings on that computer:
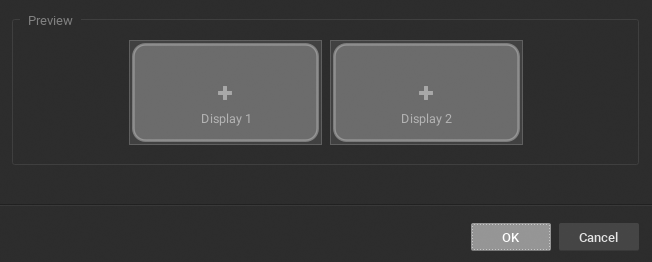
1.Right-click on the Video Wall in the Resource Tree and choose Attach to Video Wall.
2.DW Spectrum automatically detects, numbers, and previews the displays connected to the computer.
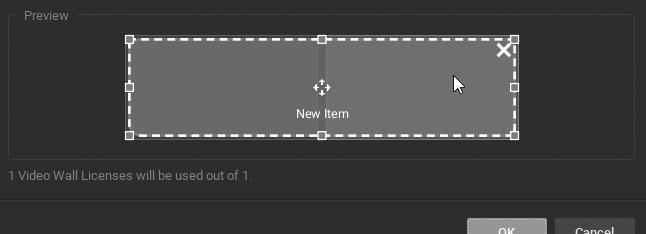
3.Click on an item in the dialog (it will change color and be retitled "New Item"). In this state you can drag the edges to resize the item, click-and-drag in the center to reposition it, or click on the "X" in the upper-right corner to remove the screen.

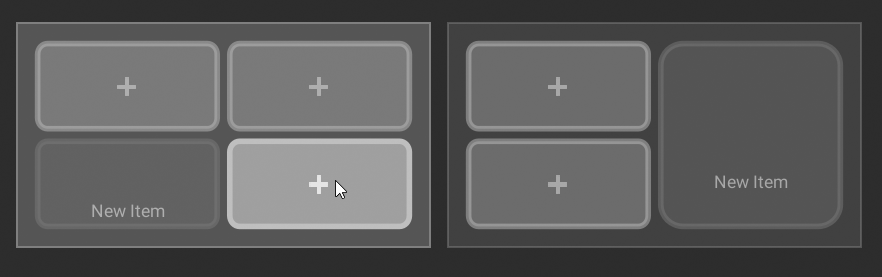
4.Typically, one Virtual screen represents one physical display. It is also possible to stretch one Virtual Screen across several physical displays:
Or, you can design one physical display that contains multiple Virtual Screens, in various combinations:
5.Once the screens are arranged as desired, click OK to save the configuration.

6.At this point you can drag-and-drop resources (devices, web pages, local files, etc.) from the Resource Tree into the Video Wall layout. It is possible to place a single device or an entire Layout into each Virtual Screen.
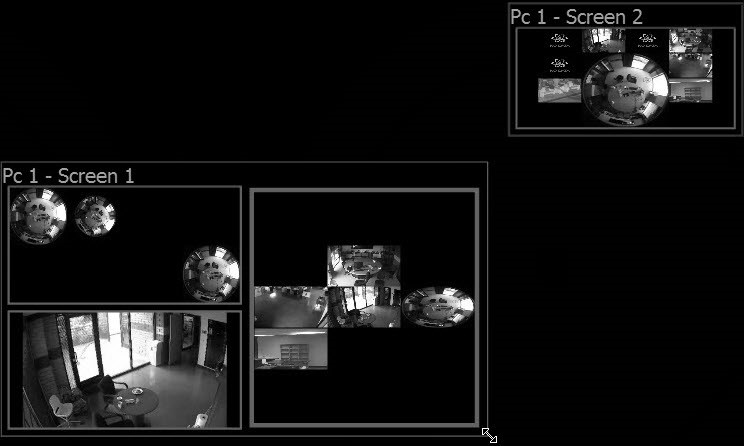
•To remove a resource from a Virtual Screen, right-click on it in the Video Wall layout and choose Clear Screen.
•To simplify the calibration process it is possible to add identification information of a resource the corresponding physical Display. To do so right-click on the desired Virtual Display and select Identify.
7.To save changes, right-click on the Video Wall in the Resource Tree and choose Save Current Matrix. The Matrix will be added to the Resource Tree under the current Video Wall, where you can right-click to rename it, load or delete it.
8.Right-click on the Video Wall in the Resource Tree and choose Save Video Wall (Ctrl+S).
To finalize configuration it is necessary to Switch Video Wall Processor to Video Wall Mode. After a Video Wall has been started on the Video Wall Processor, the current configuration can also be changed on the Video Wall Controller. To restore a Video Wall view, expand the Video Wall in Resource Tree, right-click on a saved Matrix and choose Load Matrix.
To open Video Wall on a Video Wall Controller
•Drag Video Wall onto the layout.
•Right-click on the desired Video Wall in Resource Tree and choose Open Video Wall.