DW Spectrum User Manual
By default, event monitoring is active 24 hours a day, 7 days a week. If you only want to monitor for an event at certain times, you can assign it a schedule. Note that System-generated events cannot be placed on a schedule since they should always be on.
 Note: It is possible to disable a rule entirely by unchecking the On box in the Event Rules list.
To set a schedule for an event
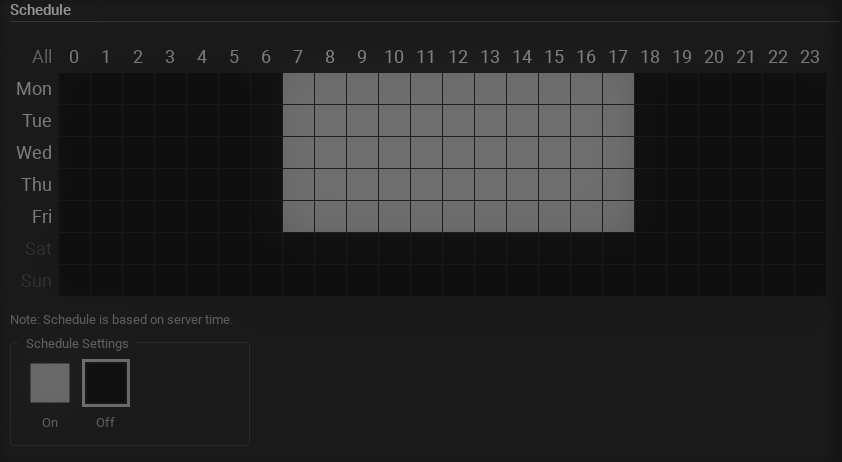
1.When a event is editable (because it is new or it is selected in the Event Rules list), click on the Schedule button to open the dialog shown below.

2.Click the On or Off button to determine monitoring behavior in specific 1-hour cells. The 0 column in this 24-hour calendar represents midnight – 1:00AM.
3.Click in a cell to apply the selected schedule setting to cells, or use these shortcuts to apply to multiple cells:
•Click-and-drag to select multiple cells.
•Click the hour heading to select an entire column.
•Click the day of the week to select an entire row.
•Click All to select all cells.
The above example shows an event that will be tracked on Monday – Friday 7AM to 6PM.
4.Click OK to accept or Cancel to discard changes.