DW Spectrum User Manual
DW Spectrum provides users with one-click updating for an entire System considers servers on different platforms in different locations and with devices, without the need for individual login to multiple devices.
Updates can be performed over the internet using the latest build available, a specific build number, or locally from a downloaded file or a file on a USB drive. For internet updates at least one System component must have an internet connection, whether it is the Client or another server.
By default, the client and each server downloads the update independently from each other. But, if the server doesn't have internet access, the update can be downloaded via another server that has an active connection. In the event that all available servers are without internet access, the client will provide each server with the desired update file.
The Desktop Client can be updated without needing to update the Server. This allows for Digital Watchdog to deliver quicker updates for Desktop Client specific issues.
When the download is distributed, servers are tracked with a "ready", "skipped", or "failed" status. The Administrator who initiated the update receives specific notifications such as "Failed to push upgrade package to all servers. Not all servers will be upgraded. Continue?" This way updating of the System as a whole does not fail because one or more individual servers is offline or unavailable. Download progress is reported graphically on the Updates tab for each server.
It is also possible to initiate a manual update for a specific server. If a new product version does not support the current operating system for a blocked server the update process will not start and upgrades for unsupported operating systems can be blocked.
Update files are stored for both the current and target version. This allows clients to update themselves when an installation is started but not finished, or when an old Client tries to connect to a system. Servers will delete files for the current version when a new update is started. Similarly, files for the target version are deleted when the target version changes, for example because the update is canceled or another target version is set. Desktop Clients do not delete update files and are not used to update other clients.
To Configure Updates Settings
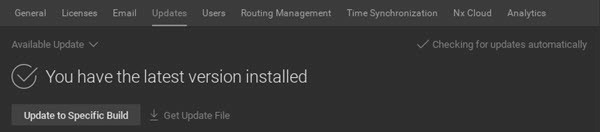
Open Main Menu > System Administration to the Updates tab for update controls. The tab shows indicates that the latest version is installed or shows which version number is currently installed.
Advanced Settings
Click on Advanced settings in the upper-right corner to configure update settings:
•Notify about available updates – If enabled, performs automatic update checks so that when a new version of DW Spectrum is released, a notification will open in the Desktop Client.
•Automatic Client Updates – Enabled by default. Connecting clients will be automatically updated to the new version when it's available.
•Check for updates disables update notifications and provides on-demand update checking instead (select the Disable Automatically Checking option). Click on Check Once to search for the latest version or Check Automatically to change the state.
Update Version
In the upper-left corner is a drop-down for choosing which version to install:
•Latest Available Updates – Selects the latest product version available.
•Specific Build – Opens a dialog where you can enter a specific Build Number and Password (available from your support team). If a new build is released to fix a particular issue, the support team may recommend that you update to a specific version.
•Browse for Update File – Lets you search for a local update package that has been downloaded (see Offline updates below).
Update Status Indicators
•A yellow exclamation mark on the server icon in the Resource Tree indicates that the server version is incompatible with versions of other servers in the system. (These incompatible servers must be updated separately).
•If the version number is shown in green, the current version is the latest one installed on the System.
•If the version number is shown in yellow, it does not have the latest build but can be updated.
•If the version number is shown in red, it does not have the latest build and cannot be updated. (Usually because the update for the particular Server is not found. It is possible the server OS is no longer supported or the package for such a platform was not published).
Online Update
1.Open Main Menu > System Administration > Updates tab.
2.Click on Download.
3.Wait for the update to download and then click on Install Update.
Offline Update to the Latest Available Version
1.Open Main Menu > System Administration > Updates tab.
2.Click on Get Update File and choose Copy Link to Clipboard.
3.Save the link to an external drive so it can be transferred to a computer with Internet access.
4.Paste the copied link into a browser on a computer with Internet access and use it to download the update file.
5.Save the update file to an external drive, then copy it onto the Client PC that is in a private network.
6.On the offline Client PC, open Main Menu > System Administration > Updates tab.
7.Click the arrow on the Latest Available Update menu and choose Browse for Update File.
8.In the file browser that opens, navigate to the external drive where the update file is saved and open it to start the update process.
Offline Update to a Specific Build
It may be necessary to accept a newer version of the end user license agreement (EULA) to proceed with installation. During the downloading phase it is always possible to cancel an update. During the installing phase the update cannot be canceled. After all online servers receive "Install" status, a confirmation dialog displays and you will be prompted to restart the Client to the updated version.
1.Open Main Menu > System Administration > Updates tab.
2.Click on the Latest Available Update menu and choose Specific Build.
3.In the dialog that opens, enter the build number and a password (this should be provided by support team), then click Select Build.
4. In Main Menu > System Administration > Updates tab, click on Get Update File and choose Copy Link to Clipboard.
5.Follow steps 3 through 8 from the above instructions.